Configure HTTPS
For more information, see HTTPS.
Self Signed
The easiest and quickest method of configuring HTTPS for NIM is to use a self signed certificate. A self-signed certificate will not be trusted by your domain, however, and any visitors will receive a certificate warning upon visiting the NIM interface.
To configure NIM to use a self-signed certificate, follow these steps:
Nagivate to Configuration > Settings.
Go to the HTTP(S) tab.
Enable the HTTPS toggle.
Ensure that Self signed is selected underneath Certificate.
Click Save.
You can now access NIM at https://localhost/
User-Provided
If your organization maintains certificates for individual servers, or has a wildcard certificate, you may use it to configure HTTPS on NIM.
To get started, follow the directions to add a certificate. Once finished, follow these instructions to use that certificate for the HTTPS connection:
Nagivate to Configuration > Settings.
Go to the HTTP(S) tab.
Enable the HTTPS toggle.
Under Certificate, choose Select from store. Then, select your user-provided certificate from the dropdown.
Click Save.
You can now access NIM at https://<hostname>.<domain>/
Let's Encrypt
NIM can also use the Let's Encrypt service to configure HTTPS. Let's Encrypt provides free, automated SSL/TLS certificates to help websites enable secure HTTPS connections easily.
Important
In order to use Let's Encrypt, your NIM server must be accessible from the internet by port 80 and port 443. NIM must also have an External Host URL (see Properties) that is publicly accessible and resolvable via DNS. This is required so that Let's Encrypt can verify and renew the certificate automatically.
To configure HTTPS using Let's Encrypt, follow these steps:
Nagivate to Configuration > Settings.
Go to the HTTP(S) tab.
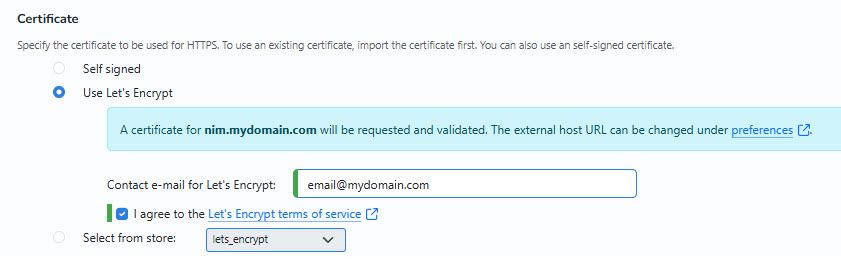
Enable the Let's Encrypt toggle.
Provide a contact email address for Let's Encrypt and agree to the terms of use.
Click Save.
You can now access NIM at https://<hostname>.<domain>/